Deer Head Silhouette Wall Art
Posted: February 26, 2013 Filed under: Crafts and Projects, Decor | Tags: antique frame, antlers, Deer, DIY, painting, Sharpie, silhouette, wall art 5 Comments
Recently, we rearranged our living room. We’ve been in our current place for about two years now, and I guess that’s how long it takes before we start itching to rearrange and add new decor. Our TV used to be on the mantle (I know, terrible, but we don’t have a whole lot of options). It’s now in front of a window, which I’m not sure is much better, but we no longer have to strain our necks way up to watch movies and, the best part is that it opens up a huge new project space: a mantle to decorate! And, I am not taking this responsibility lightly.

I found some old framed needlepoint woodland creatures that I’ve deemed mantle-worthy, but that still left about 3/4 of the space left to be filled. Thinking about keeping with the woodland theme, I rummaged through all the old frames, canvases, etc. I have lying around. I came across this wooden plaque (which are super cheap to pick up at Hobby Lobby) and a few frames. The plaque actually fit perfectly in one of the frames and I got the idea to make a faux deer head “mounted” on the plaque.

This is a seriously easy project that’s fun and whimsical but visually bold. You could really use any image or colors, but I wanted to play off of the idea of (the animal-friendly version of) a mounted deer head, and I mounted the plaque to the outside of the frame, instead of to the back, to enhance this feeling.

You’ll need:
Wooden plaque
Silhouette of a deer ( I just googled it and printed out my favorite, found here)
X-acto knife
Self-healing cutting mat ( I love this one for small projects)
Pencil
Acrylic Paint (background color of choice, I went with black)
Silver or Gold Sharpie or paint
9001 or other high-strength adhesive
Antique frame

Paint wooden plaque desired color and let thoroughly dry. Make sure silhouette is properly sized for the plaque. Once you have the right size, cut on the image outline with an X-acto knife on a self-healing mat. Once your image is cut out, secure it with a few small pieces of tape to the plaque, so it doesn’t move around and trace with a pencil.
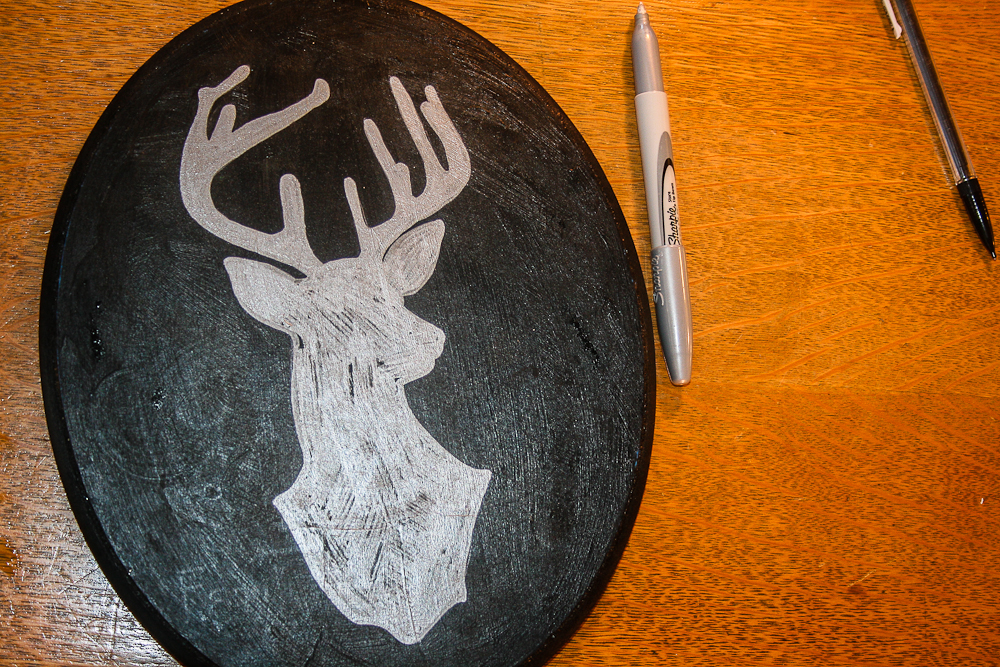
Remove image and make any adjustments or artistic changes to the outline. Then, trace the pencil line with a silver or gold Sharpie. The silver and gold Sharpies have more of a paint-like quality to them, so I don’t recommend trying black or other colors. Fill in the outline once and let dry for a few minutes.
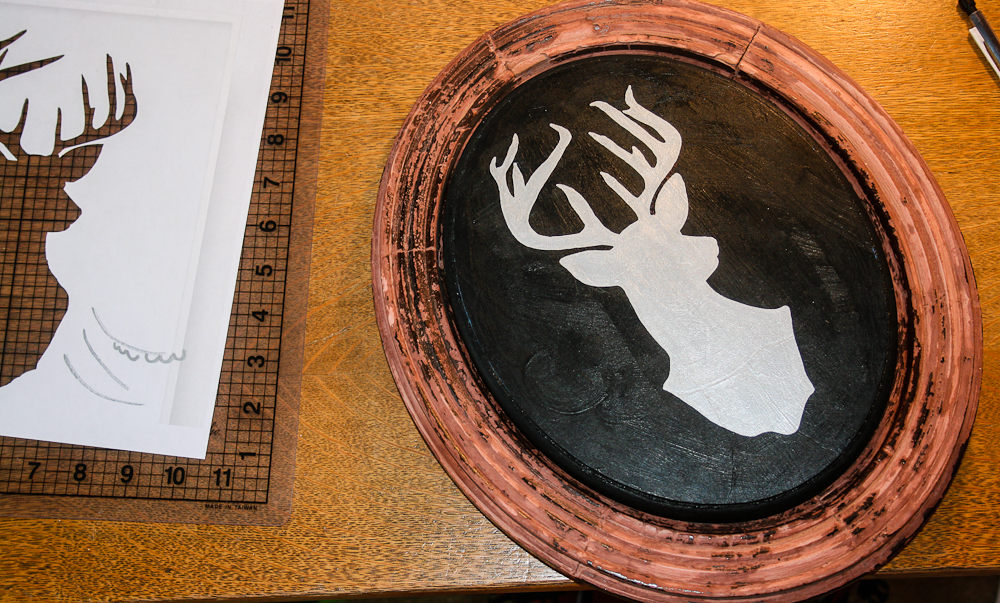
Going the other direction, add a second layer of Sharpie, using the side of the tip to sort of paint it on. Last, retrace the image to make sure the edges are clean. You can do any small damage repair with a black Sharpie. Once the plaque is dry, apply adhesive to frame where the plaque will be. Let the adhesive become tacky for a few minutes before pressing the plaque into place. Once in place, set a heavy stack of books or other objects on top of the plaque to bond. Let sit for a few hours. There you have it!

I know this will be a lovely addition to the the rest of the little creatures I’ve already got pegged for the wall. Stay tuned to get a view of the full mantle once it’s finished!
Classic Movie Star Wall Art
Posted: April 11, 2012 Filed under: Crafts and Projects, Decor | Tags: black and white movie, cheap diy, DIY project, film, Movie star, picture frames, scrapbook paper, silhouette, wall art 4 Comments
At some point in high school, I came to own the book Perfect Pairs. It’s an adorable little picture book with stars from black and white films. Immediately, I knew I couldn’t keep all of these wonderful images pent up in this book, so, knowing I would find some way to display them, I cut out my favorites as silhouettes. I ended up arranging them on canvases as a collage multiple times, but never liked anything enough to glue it down.

Fast forward 7 or 8 years. I had carried these cutouts with me for years in one craft box or another… I was an art major after all, so I have quite a collection of these boxes.

Sometime between snagging 75 cent “damaged” (or charming, character-filled) frames from Hobby Lobby‘s clearance section and coming across these cutouts, I was struck with an idea to put the two together. Knowing I would need a little splash of color, I decided to put scrapbook paper behind the images.


Besides the intricate gold frame below on the left (which my brother picked up for me at a junk shop), I estimate that this project cost me around $10 total.


This project is ridiculously cheap and an incredibly easy way to fill up wall space with multiple small frames. And I can say, after years of carrying around these movie star scraps, I couldn’t be happier with how they ended up being displayed.


You could really cut out silhouettes of anything you like, including black paper into shapes or pictures you took yourself. Have fun making your own silhouette art on the cheap!
")
